This page was translated by AI and proofread by humans. You may want to view in original language.
Acceptance Process
The following is from ChatGPT.
After purchasing a computer online, inspecting the machine is a crucial step to ensure that the product you received meets your expectations. Here are some things to keep in mind during acceptance:
- Appearance Inspection:
- Inspect the packaging to ensure it is intact and free of visible damage or signs of impact.
- After unpacking, inspect the computer (e.g., laptop or desktop) for scratches, dents, or other cosmetic defects.
- Accessories Complete:
- Confirm that all accessories are present, including the power adapter, data cable, manual, warranty card, etc.
- Check for any extra gifts (e.g., mouse, keyboard, etc.). If promised, ensure they are also received.
- Power-on Test:
- Power on the computer to check that it boots normally and observe the smooth boot process.
- Confirm that the screen displays properly, with no bright or dead pixels or color distortion.
- System and Software Check:
- Check that the operating system is installed correctly and confirm its version.
- Verify that pre-installed software is functioning properly and ensure there are no issues.
- Hardware Performance Test:
- Use benchmark software (such as CPU-Z, GPU-Z, Cinebench, etc.) to check the hardware configuration and ensure it matches the specifications at the time of purchase.
- Verify that the memory, hard drive, graphics card, and other hardware are functioning properly.
- Function Test:
- Test the keyboard, touchpad, USB ports, audio ports, Wi-Fi, and Bluetooth for proper function.
- For laptops, check that the camera and microphone are functioning properly.
- Heat Dissipation and Noise:
- While running certain programs, observe the computer's heat dissipation and fan noise to ensure there are no abnormalities.
- Warranty and After-Sales Service:
- Confirm the warranty terms and after-sales service information, and retain any relevant receipts and invoices.
- Prompt Feedback:
- If you discover any problems, contact the seller or customer service immediately to resolve them, ensuring they are within the return or exchange period.
By following these steps, you can effectively inspect your online computer and ensure its quality and performance meet your needs.
Actual Process
Appearance Inspection
Check that the packaging seal is intact. Record an unboxing video to confirm that all accessories are present and that the exterior is undamaged.
Power On
The computer will automatically activate the Windows 11 operating system upon startup. During activation, you will need to log in to a Microsoft account. After activation, use relevant software to view the computer's specifications. Here, I'm using TB-toolbox.
View Parameters
Overview
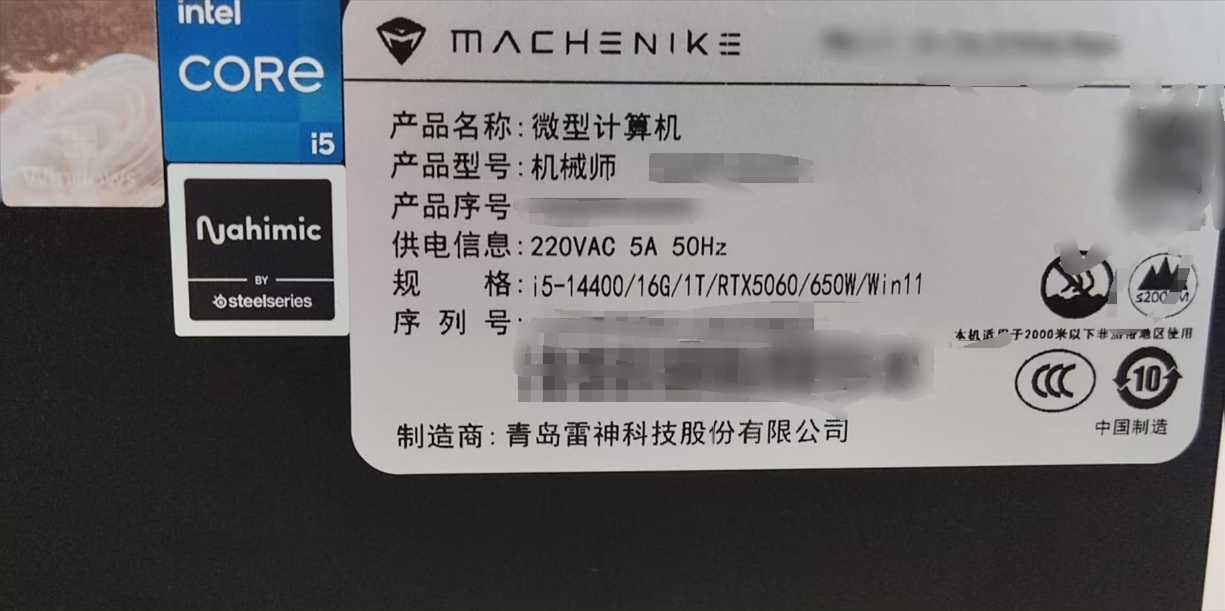
Declared Parameters:
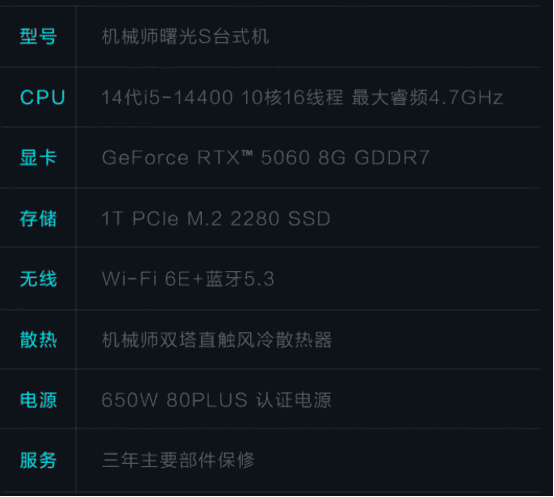
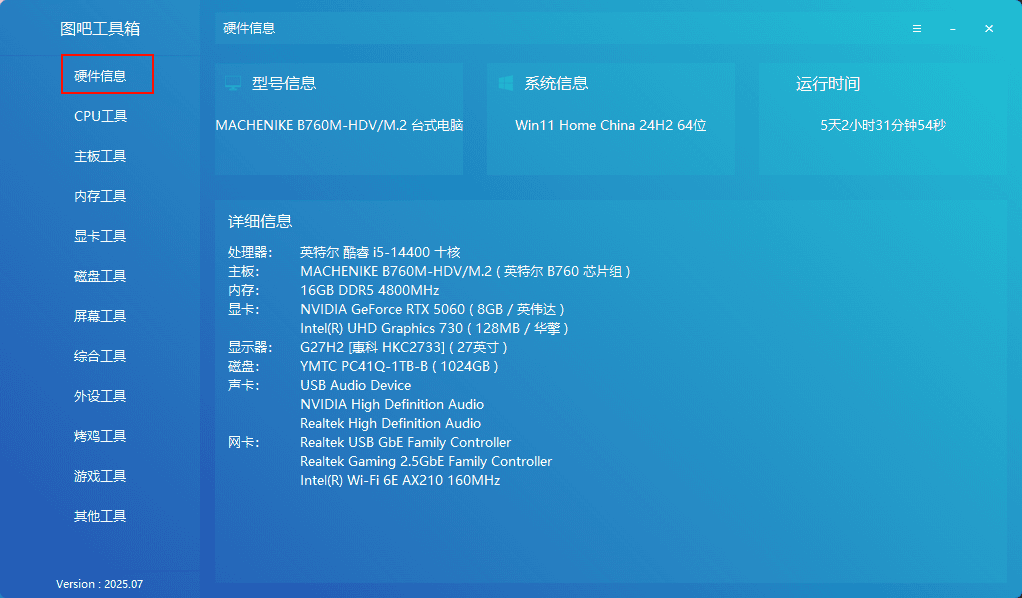
Actual Parameters:
View via: Hardware Information
CPU
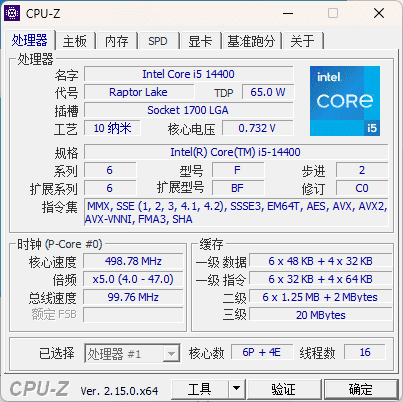
Intel Core i5-14400, 10 cores, 6P + 4E, 16 threads.
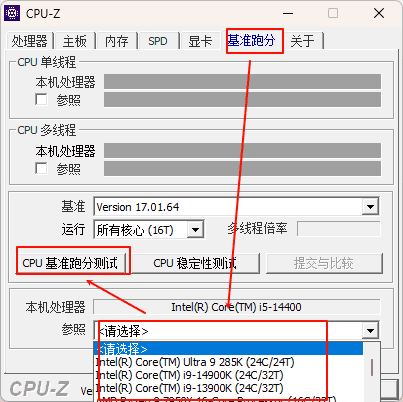
View via: CPU Tools -> CPU-Z

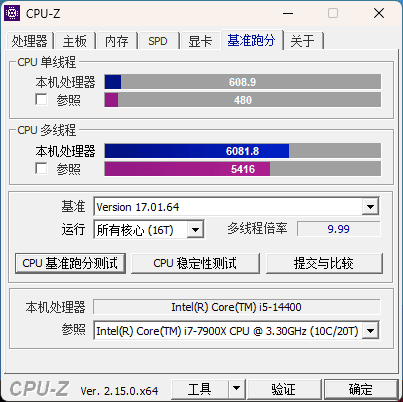
CPU Benchmark: Still using CPU-Z, under 'Benchmarks', select 'Reference' and then click 'CPU Benchmark Test'.
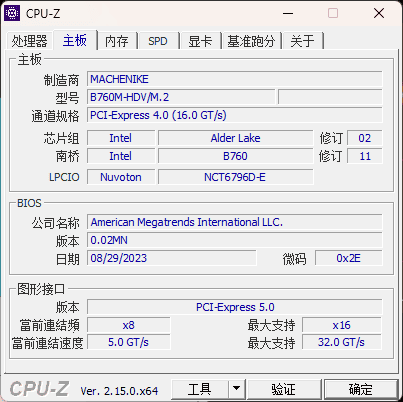
Motherboard
B760M
View method: Same as above
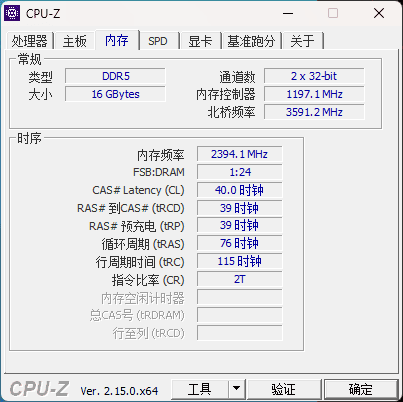
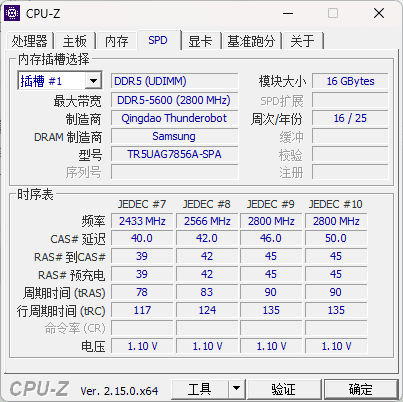
Memory
16GB DDR5, dual-channel, 2 slots total, with one slot left for expansion.
View method: Same as above
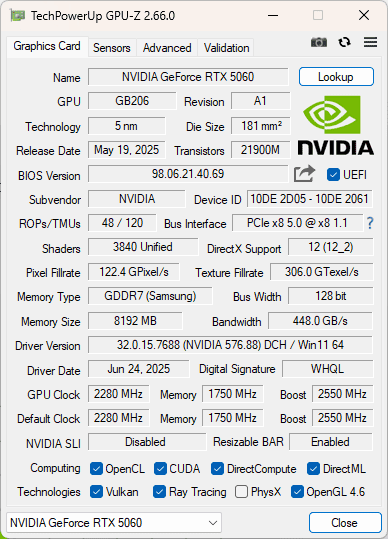
GPU
RTX 5060, 8GB. Also has an integrated graphics card, but it's so bad I won't post a picture of it.
| Parameter Name | Parameter Value |
|---|---|
| GPU Model | NVIDIA GeForce RTX 5060 |
| Technology | 5 nm |
| Memory Size | 8192 MB |
| Memory Type | GDDR7 |
| Bandwidth | 448 GB/s |
| Bus Width | 128 bit |
| Shaders/CUDA Cores | 3840 |
| Direct X | 12 |
View Method 1: Same as above

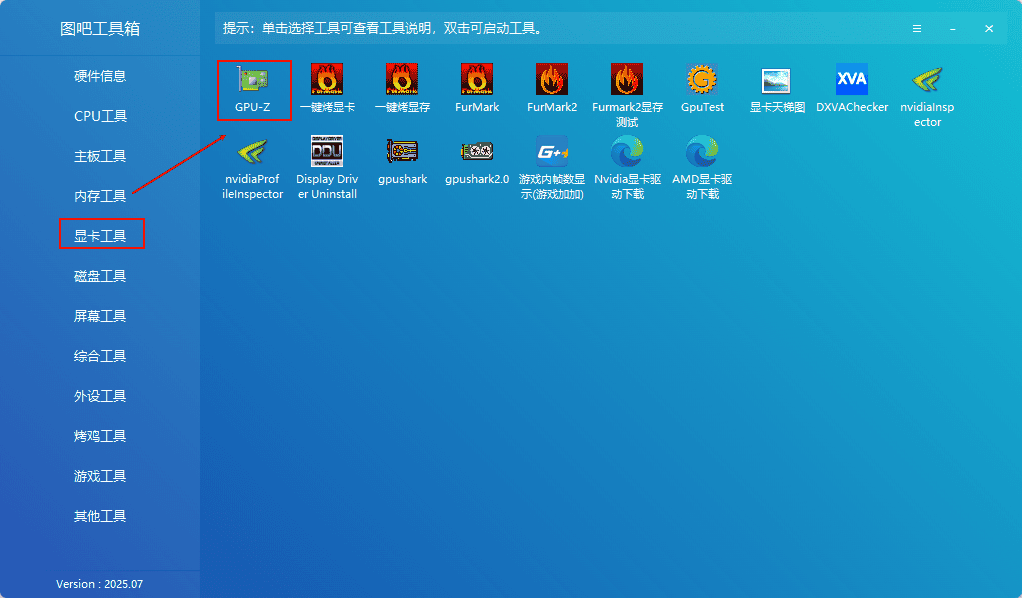
View Method 2: Graphics Tools -> GPU-Z
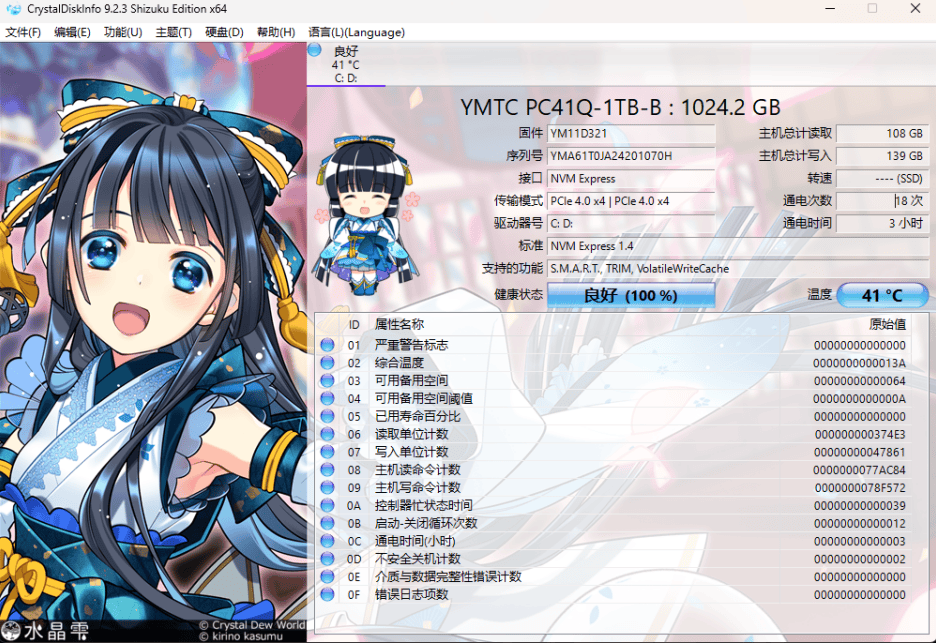
Hard Drive
954GB SSD, NVM Express 1.4, powered on 18 time for 3 hours.
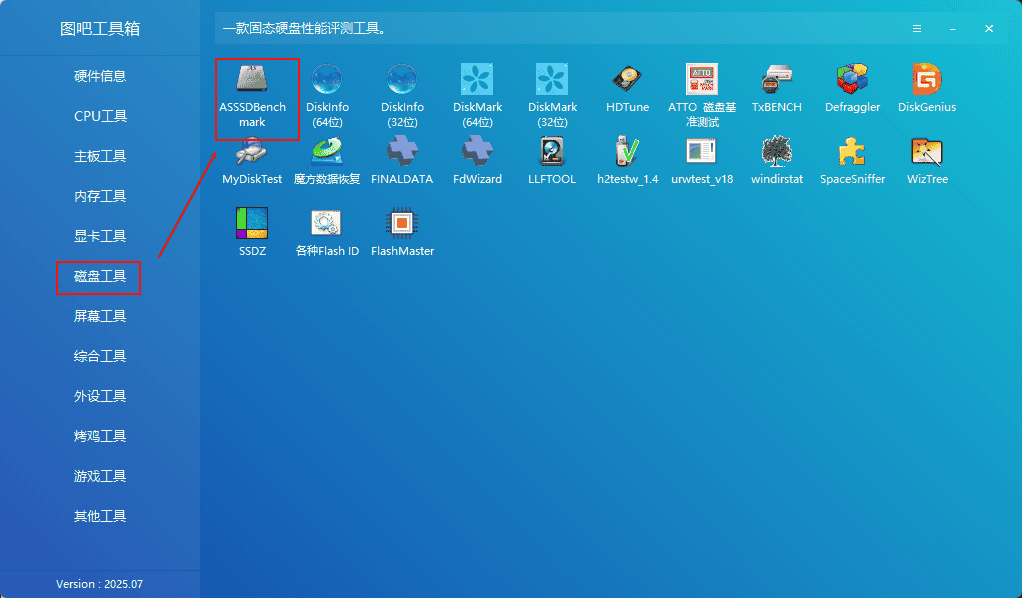
View: Hard Drive Tools -> DiskInfo
Hard Drive Test: Hard Drive Tools -> ASSSDBenchmark, click 'Start'.

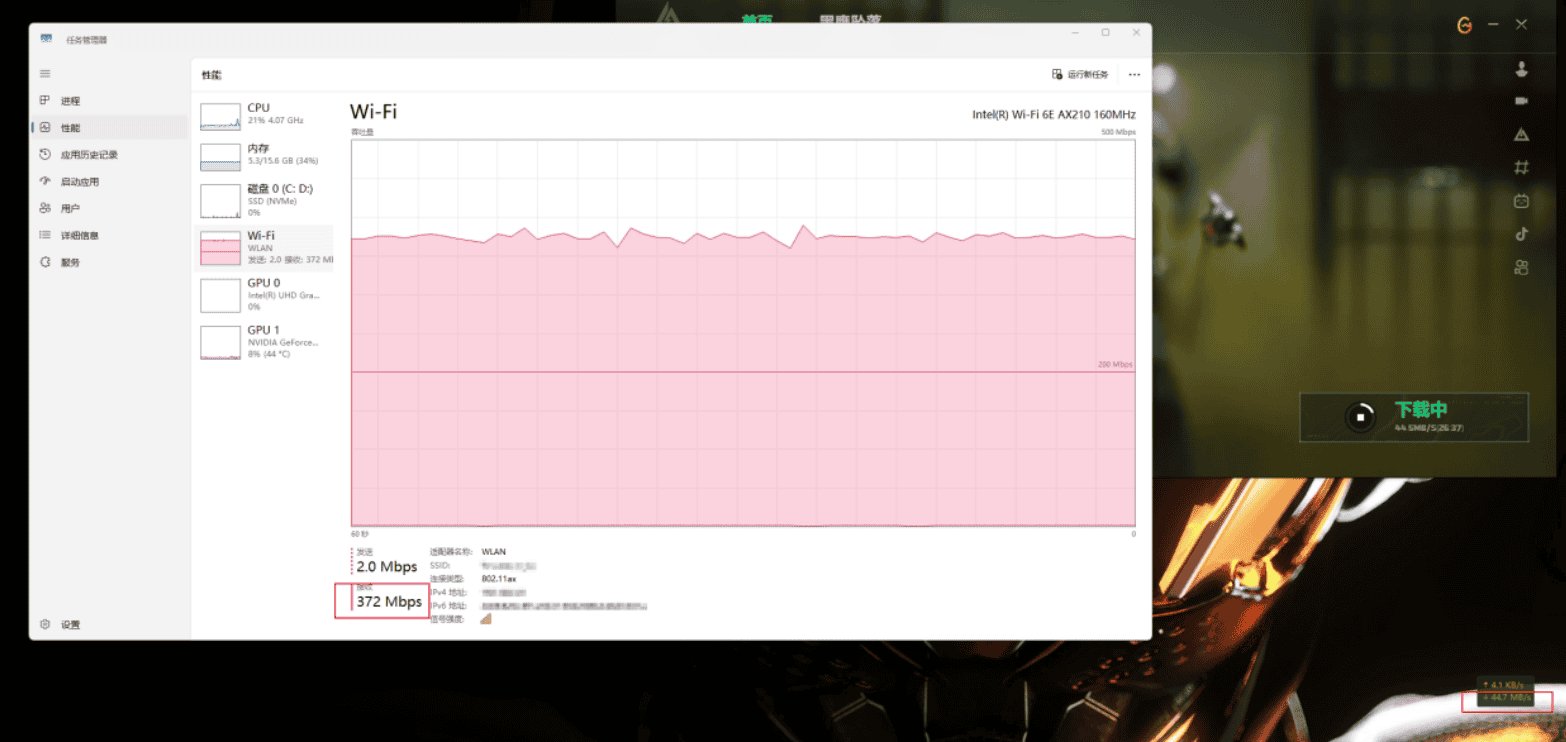
Network Card
When downloading games, with a 400Mb/s bandwidth, the actual download speed can reach up to 370Mb/s.
Stress Testing
Stress testing primarily involves running a newly built or purchased computer under high load for an extended period of time to test its stability and performance. Stress testing can help identify potential computer issues before they occur, preventing them from affecting work or requiring returns. The stress testing time should not be too long. During the stress testing process, attention should be paid to stability (crashes, blue screens, black screens), power consumption, heat dissipation, and noise levels.
Stress testing can be performed either single- or dual-processing. Stress testing the CPU or GPU individually is called a single-processing test. Stress testing both simultaneously is called a dual-processing test.
I used a dual-processing test; if you prefer a single-processing test, skip steps 2 or 3 below.
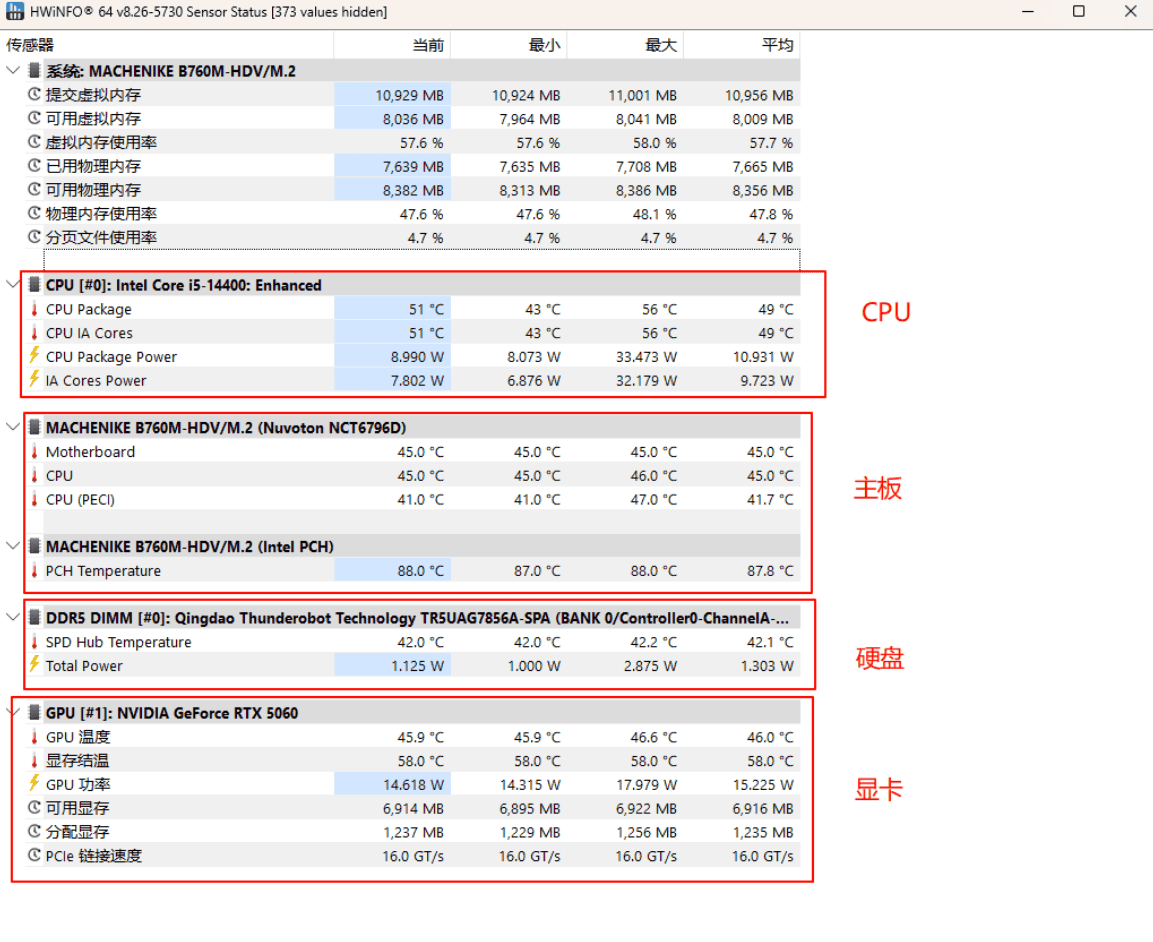
- Use HWiNFO to monitor temperature, power consumption, and other parameters. Go to General Tools -> HWiNFO, select 'Show Sensors Only', and click 'Start'.

By default, there will be a lot of content; you can right-click to hide unnecessary content.
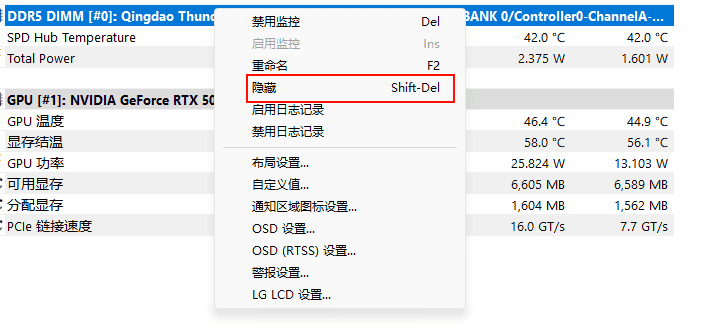
Finally, the following content remains.
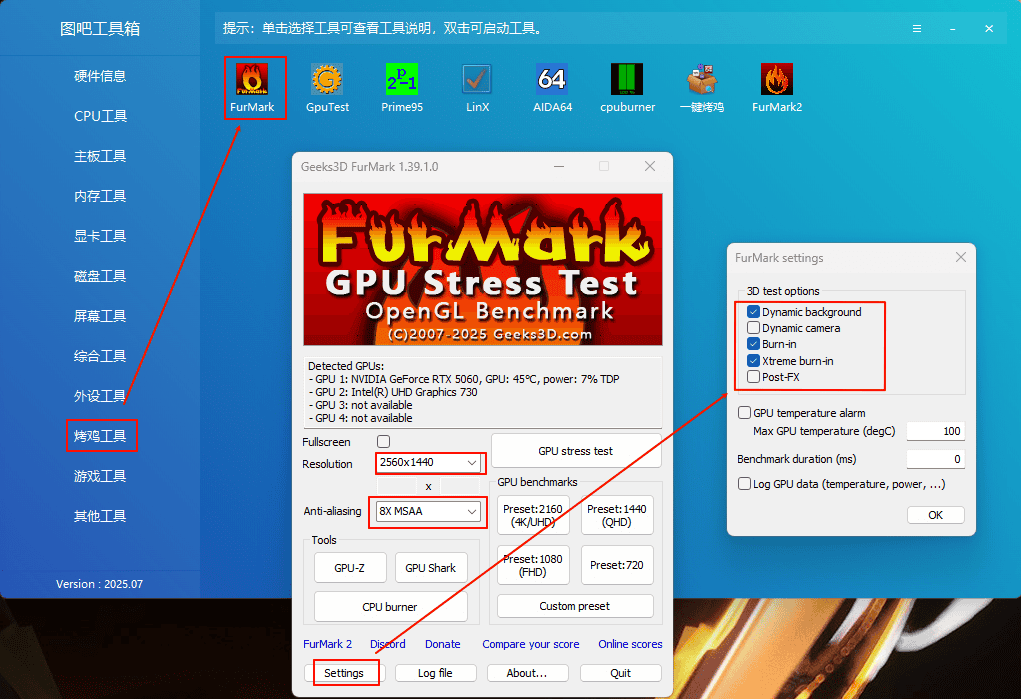
2. Use FurMark to test the GPU. Go to Burn-in Tools -> FurMark. Under Anti-aliasing, select '8X MSAA'. Under Resolution, select the screen resolution. My screen is 2K, so I chose 2560*1440. Then, click Settings in the lower left corner and check 'Dynamic background', 'Burn-in', and 'Xtreme burn-in'.
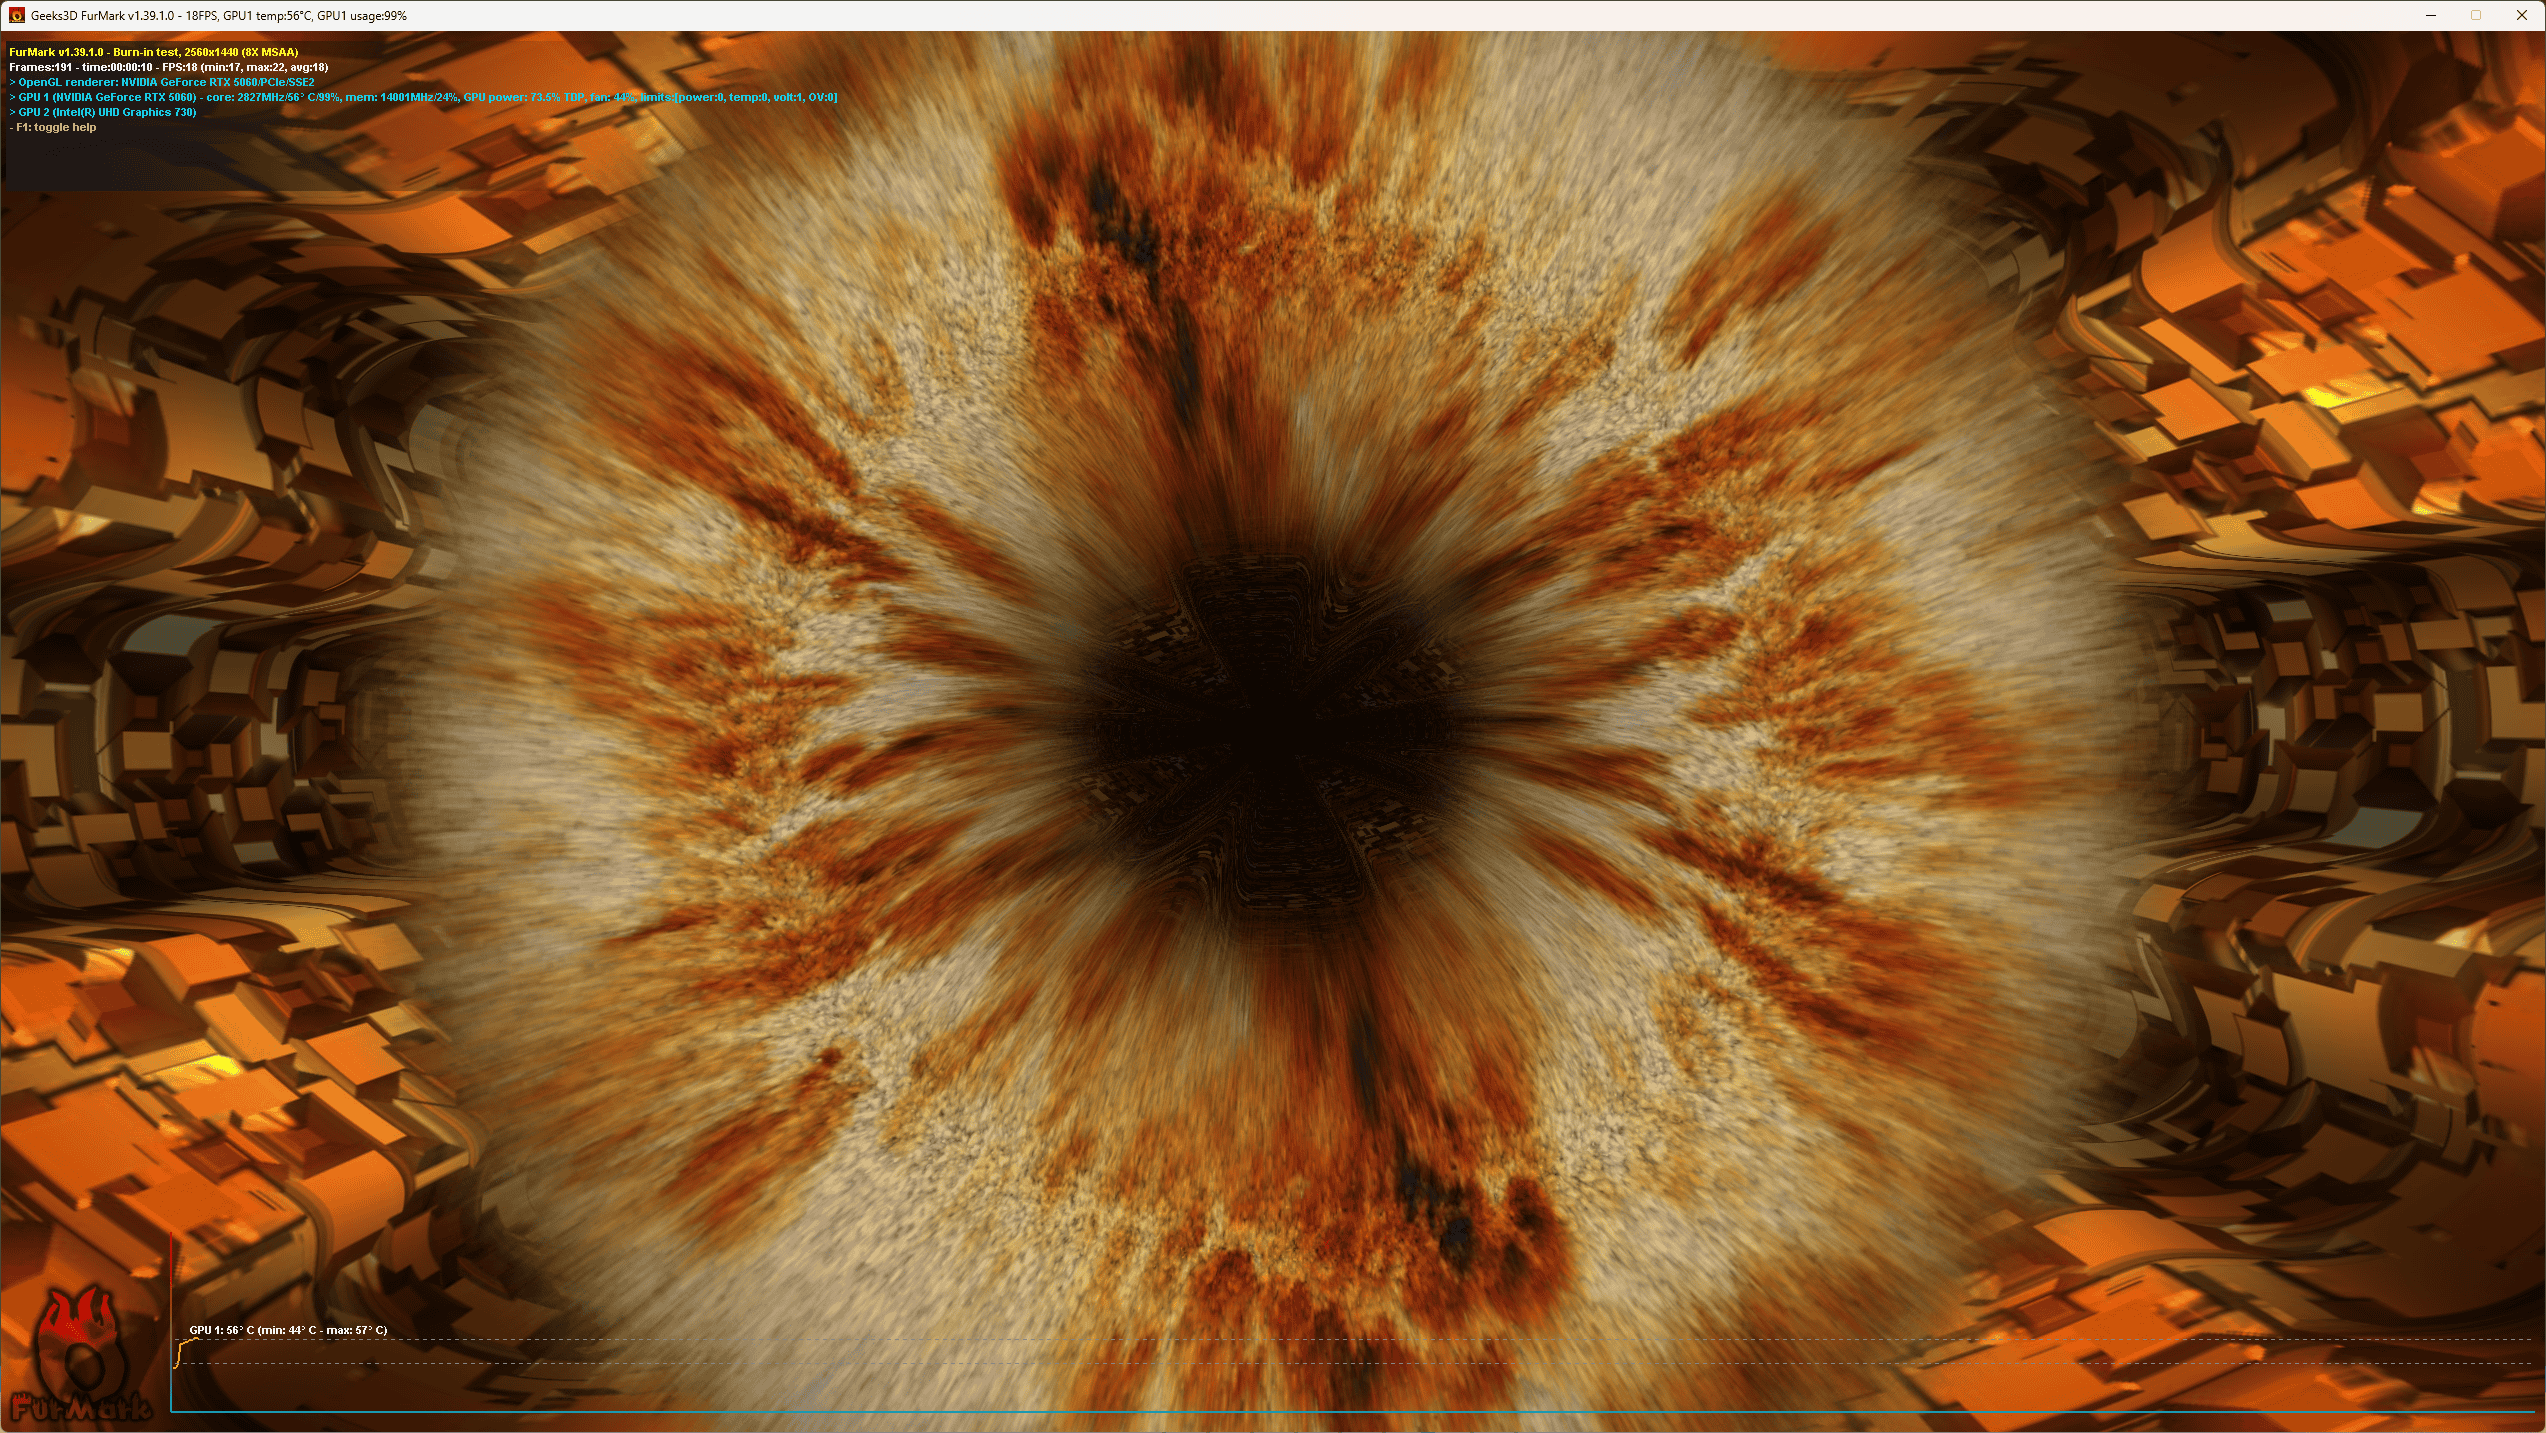
After completing the settings, click 'GPU stress test'. The following screen will appear, indicating that the GPU stress test has begun.
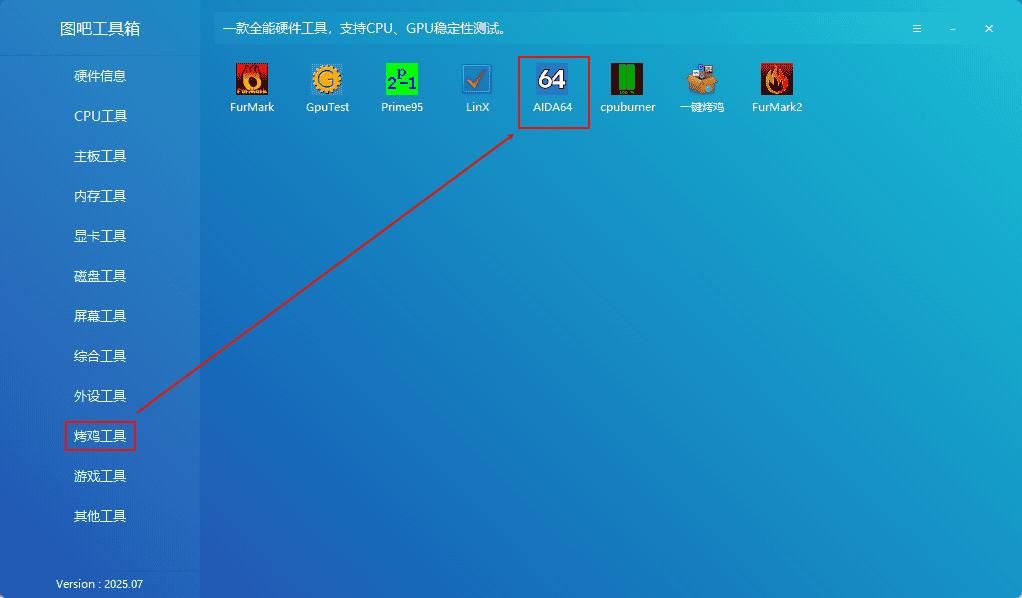
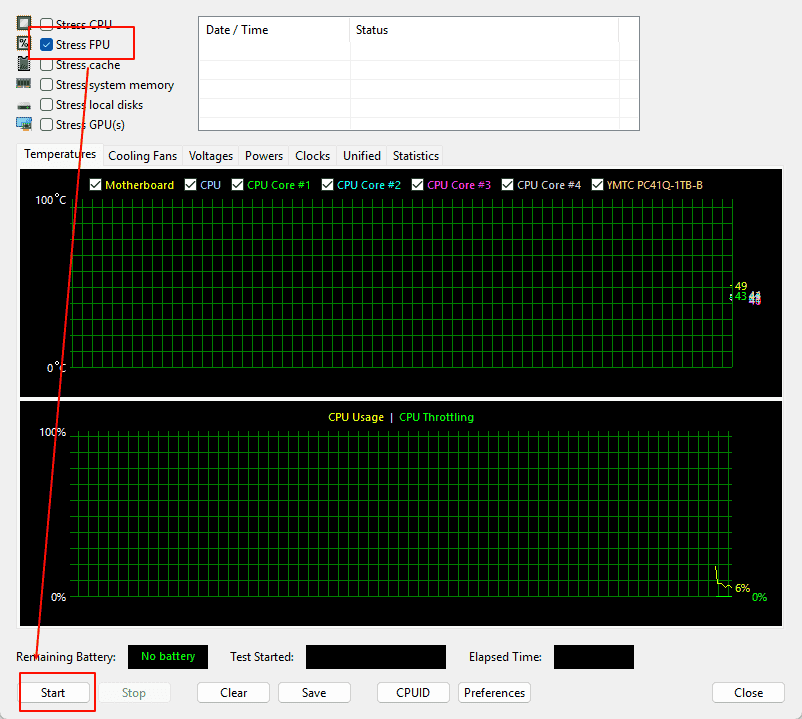
3. Use AIDA64 to stress the CPU. Go to Stress Test > AIDA64.
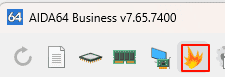
Click the small "System Stability Test" icon in the menu bar.
Since I'm using a desktop, I selected 'Stress FPU' and clicked Start.
Stress CPU tests CPU stability under daily use, office work, web browsing, gaming, and other scenarios, while Stress FPU tests CPU stability under extreme loads (such as prolonged, high-intensity floating-point operations). If you have a thin and light laptop, stressing the CPU alone is sufficient; if you have a gaming laptop or desktop, stressing the FPU is recommended.
4. End the stress test. It usually takes 15 to 30 minutes to do stress test. To stop stressing the GPU, simply close the FurMark window. To stop stressing the CPU, simply click "Stop" in AIDA64.
Stress Testing Time:

Monitoring Data:
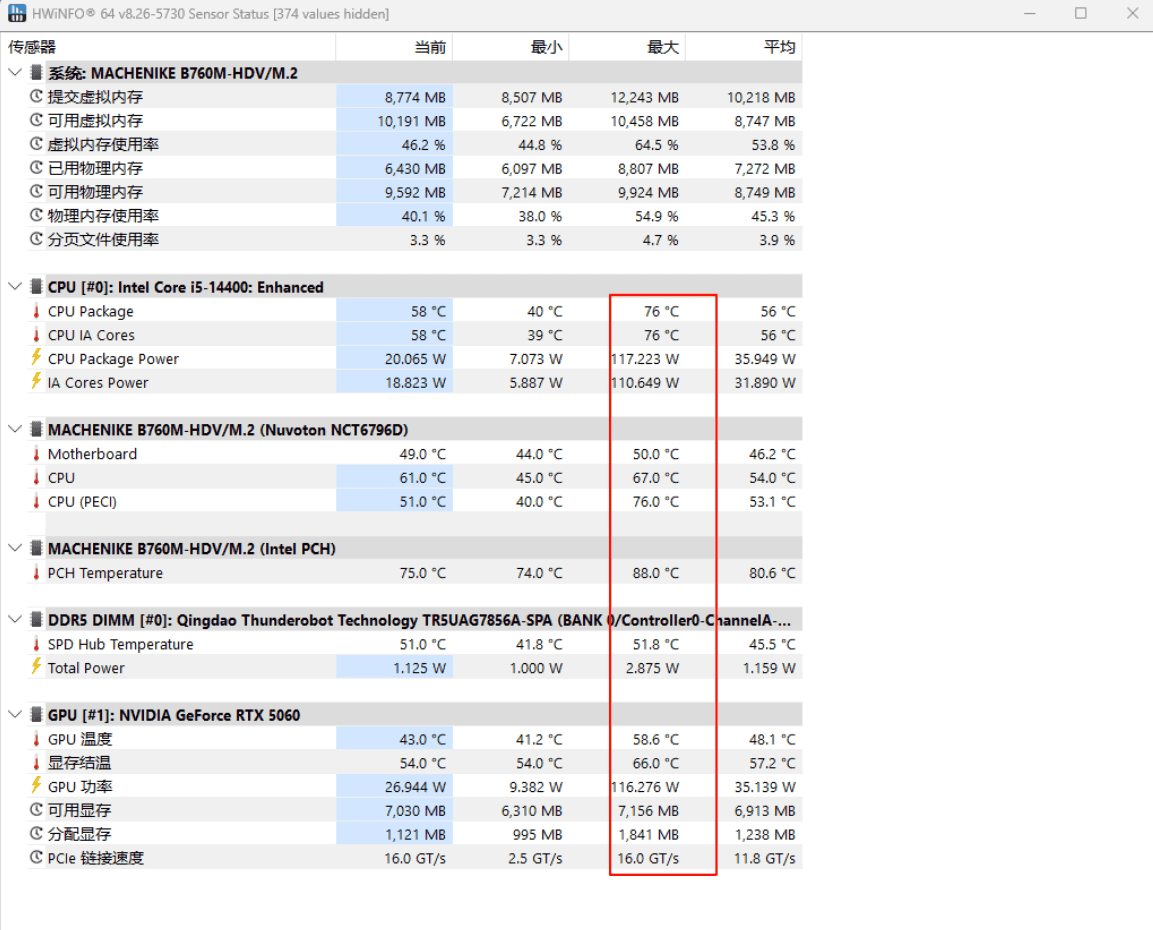
During stress testing, the fan noise is quite loud and heat output increases significantly. Placing your hand near the fan vent allows you to feel the warmth, though it doesn't burn. It is the same when you play computer games. The sound and heat are normal during daily work, and no fan noise is noticeable.
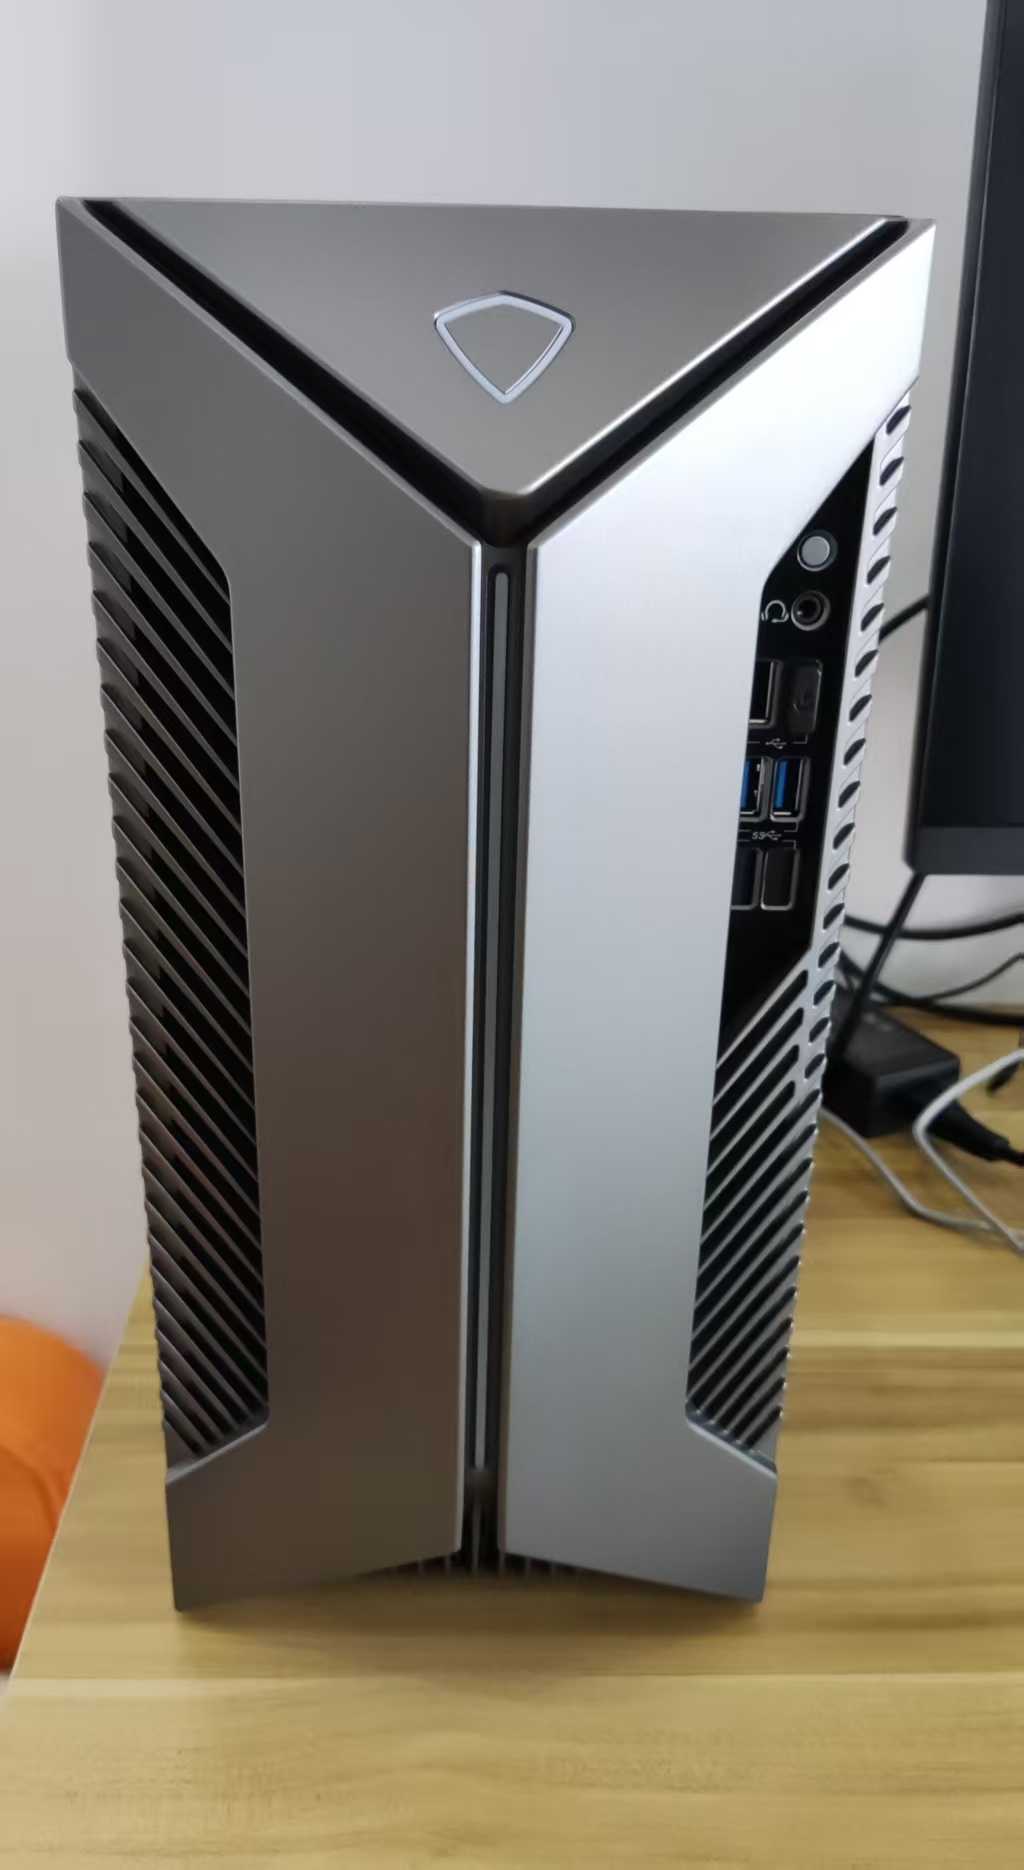
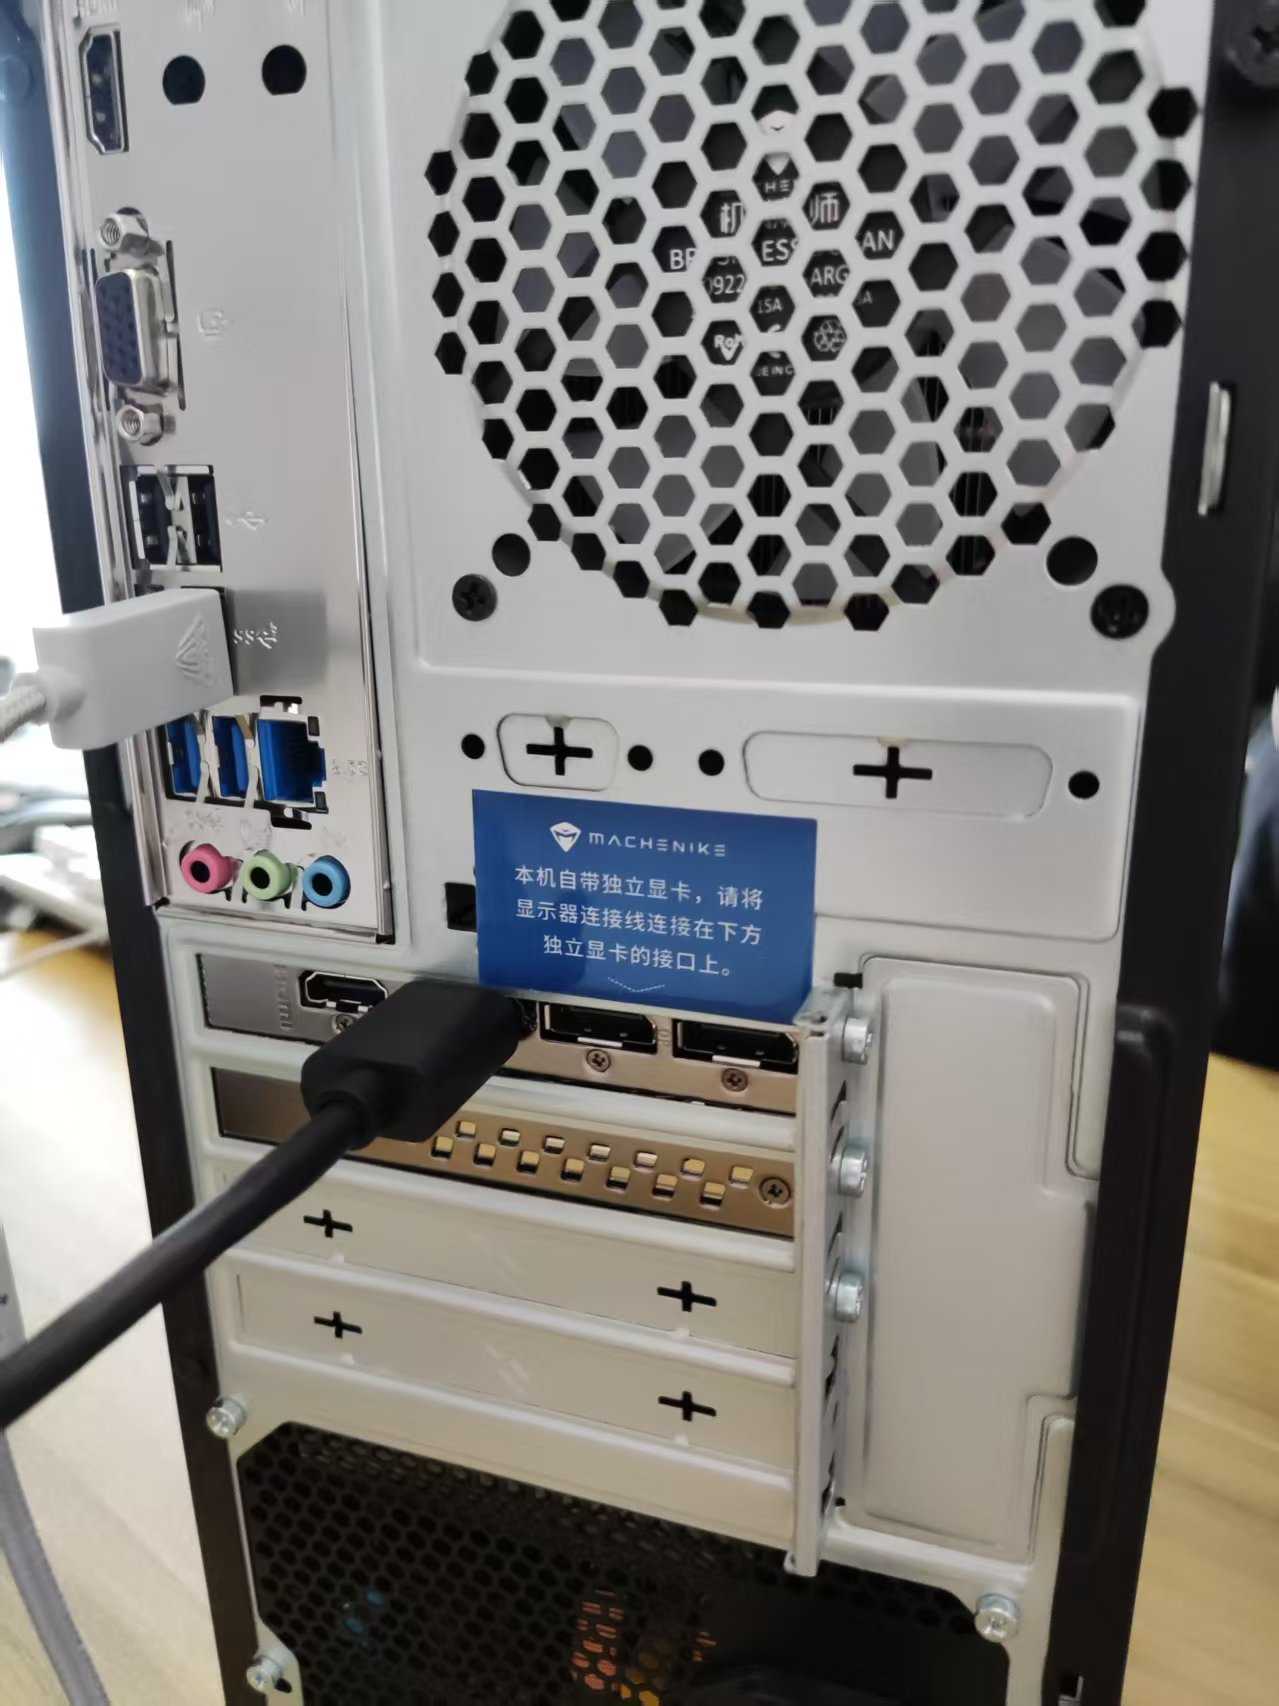
Below are photos of the host.
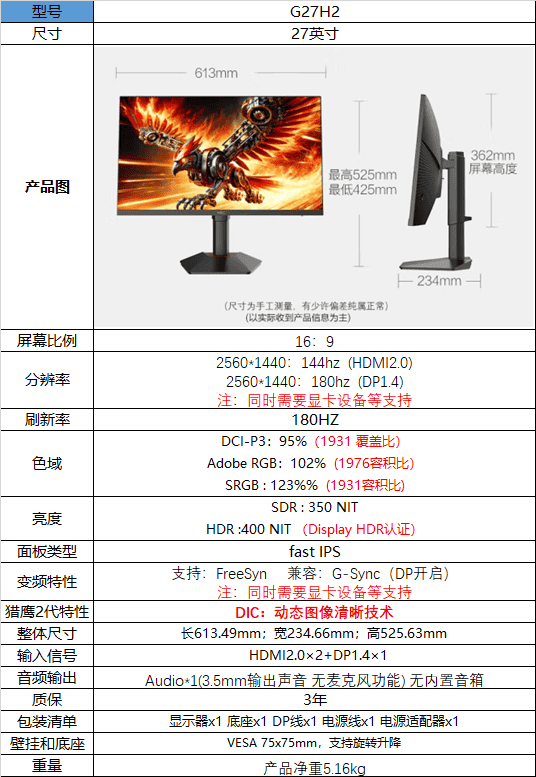
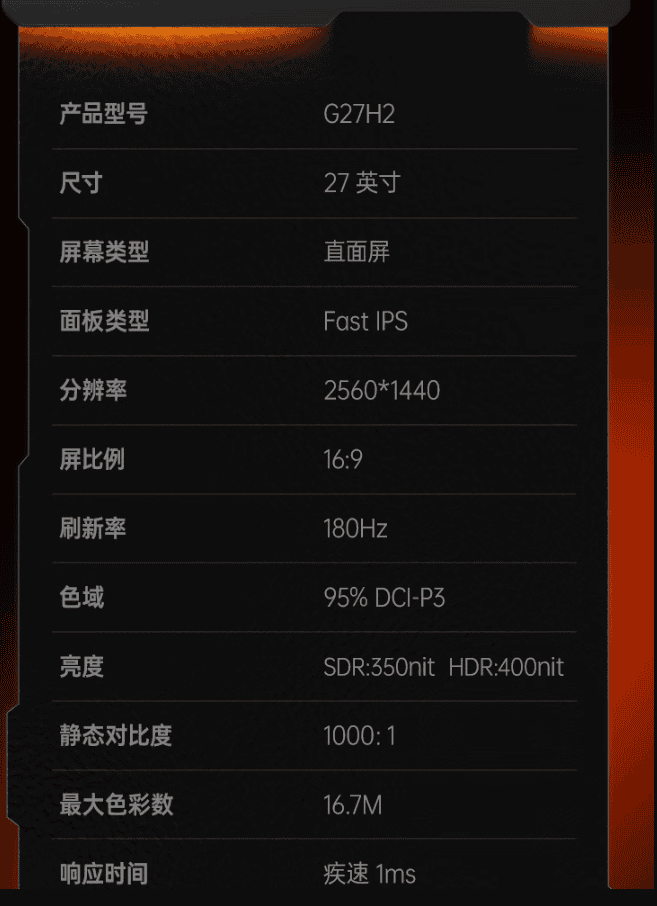
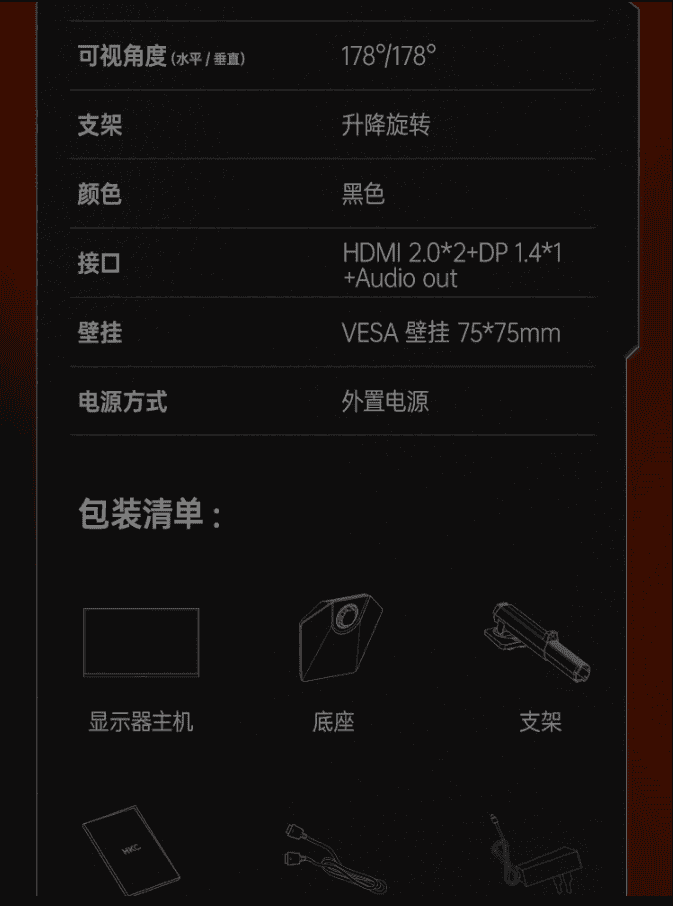
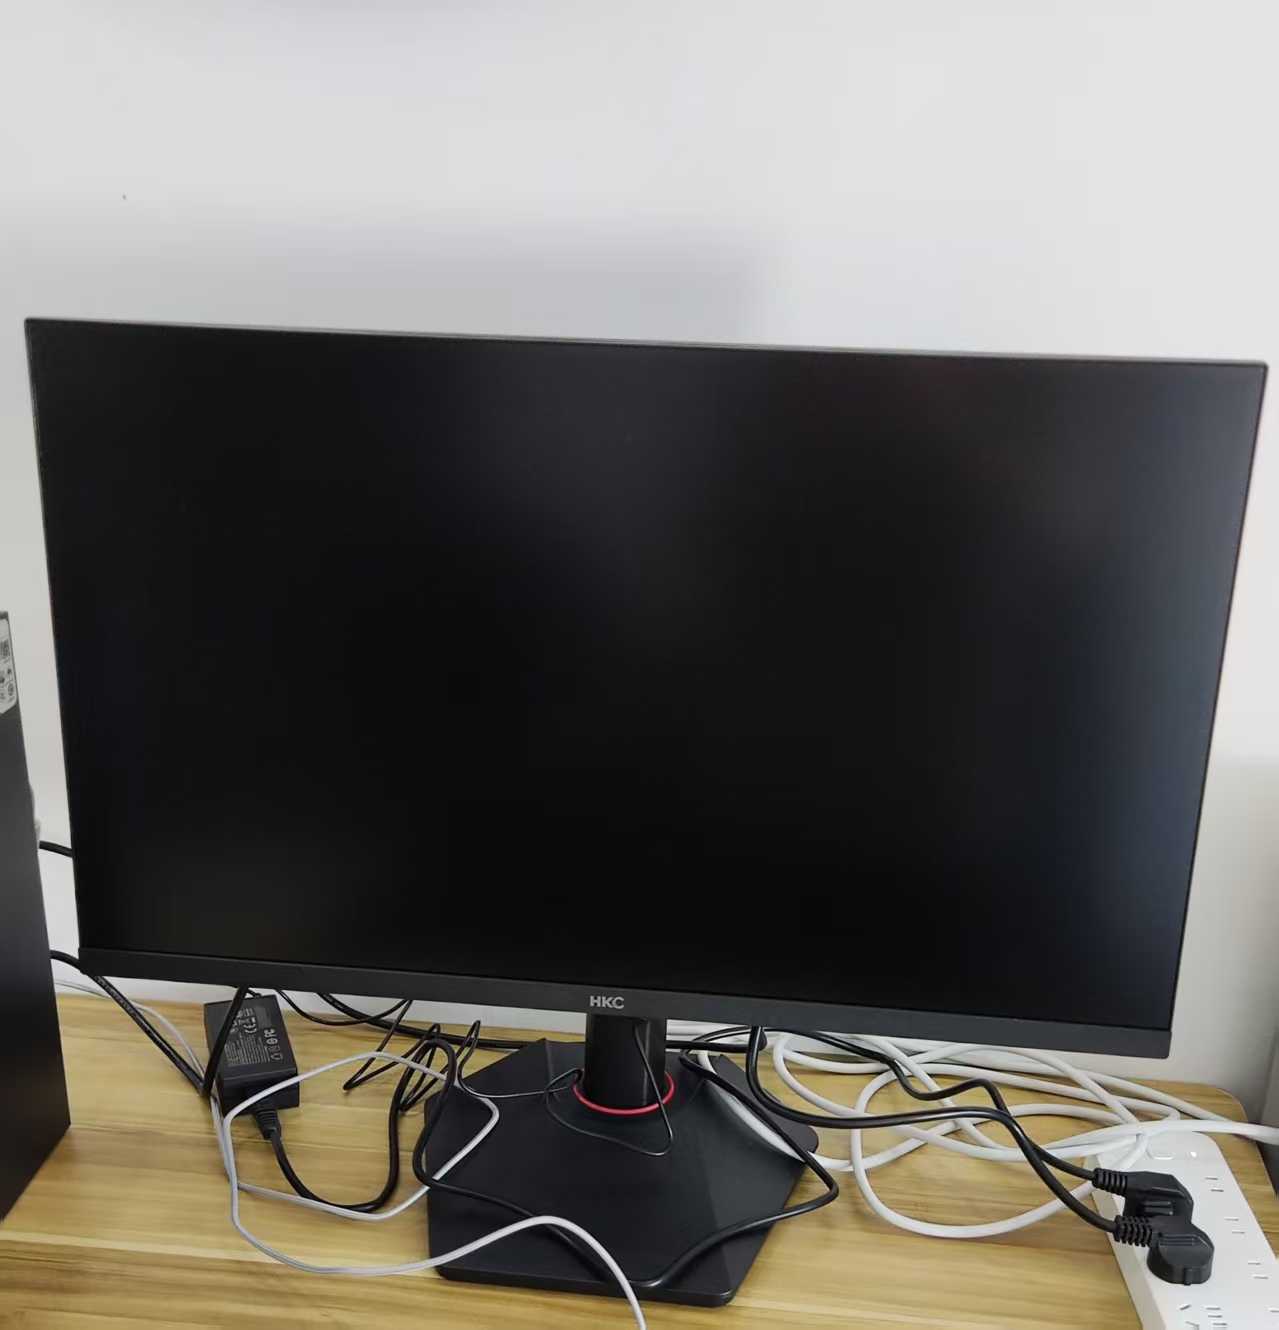
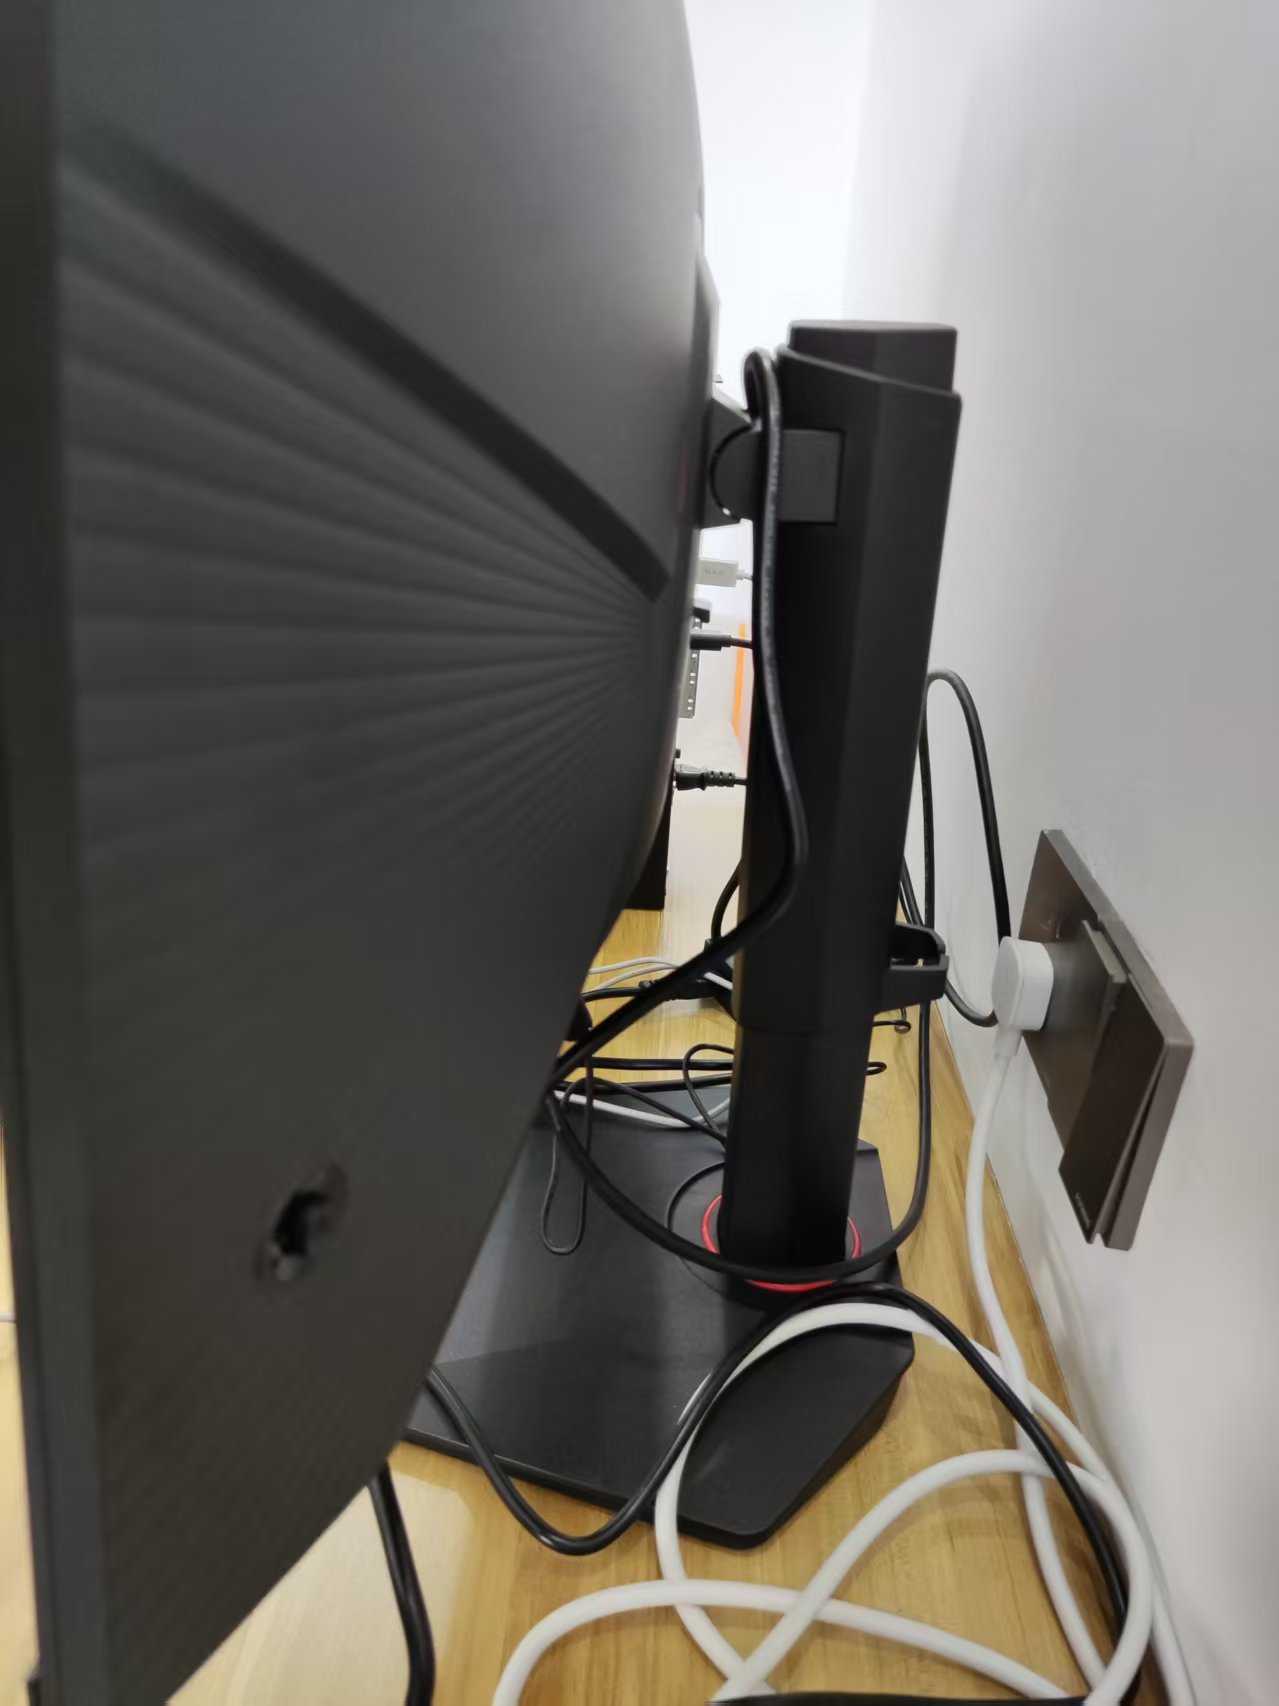
Monitor
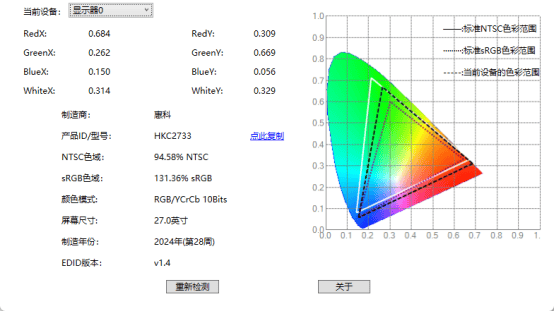
Product Description: HKC 27-inch 2K HD 180Hz High Refresh Rate Fast IPS Wide Color Gamut HDR400 Esports PS5 Gaming 1MS Rotating Liftable PC Monitor Falcon II G27H2
Color Gamut, Size
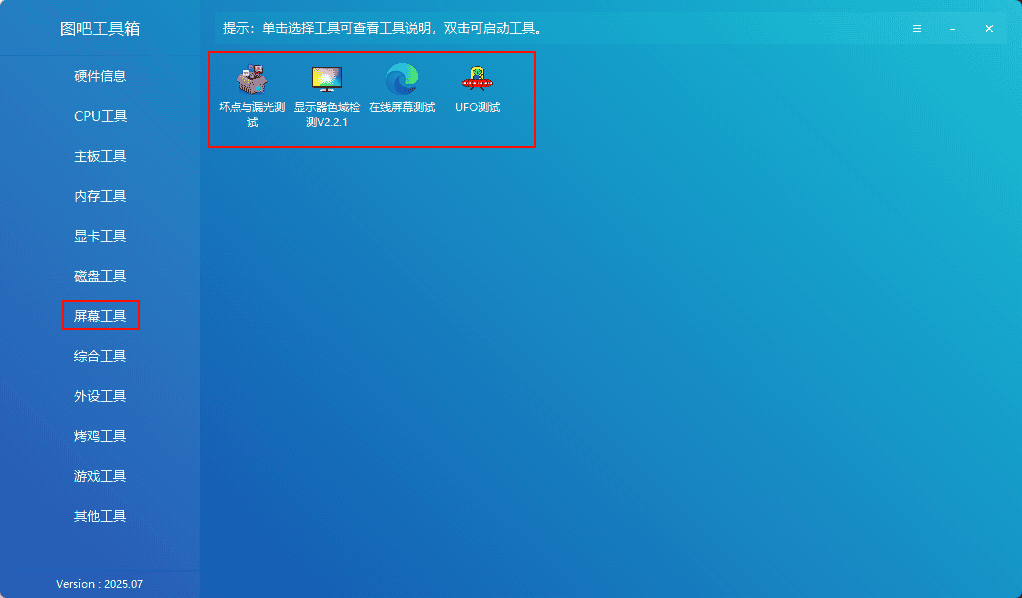
Screen Tools -> Monitor Color Gamut Test
Defective Pixels, Light Leakage, and Smear
Screen Tools -> Defective Pixel and Light Leakage Test, Online Screen Test, UFO Test
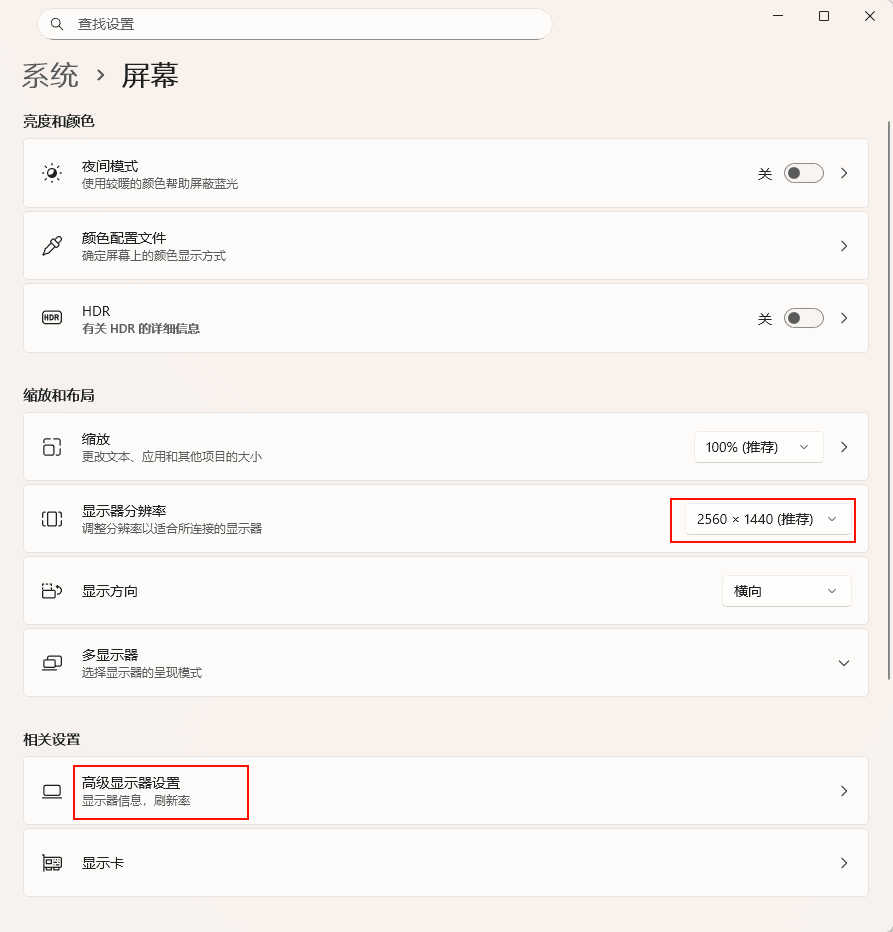
Resolution
In Windows, set the resolution and refresh rate in System -> Screen.
OSD Menu
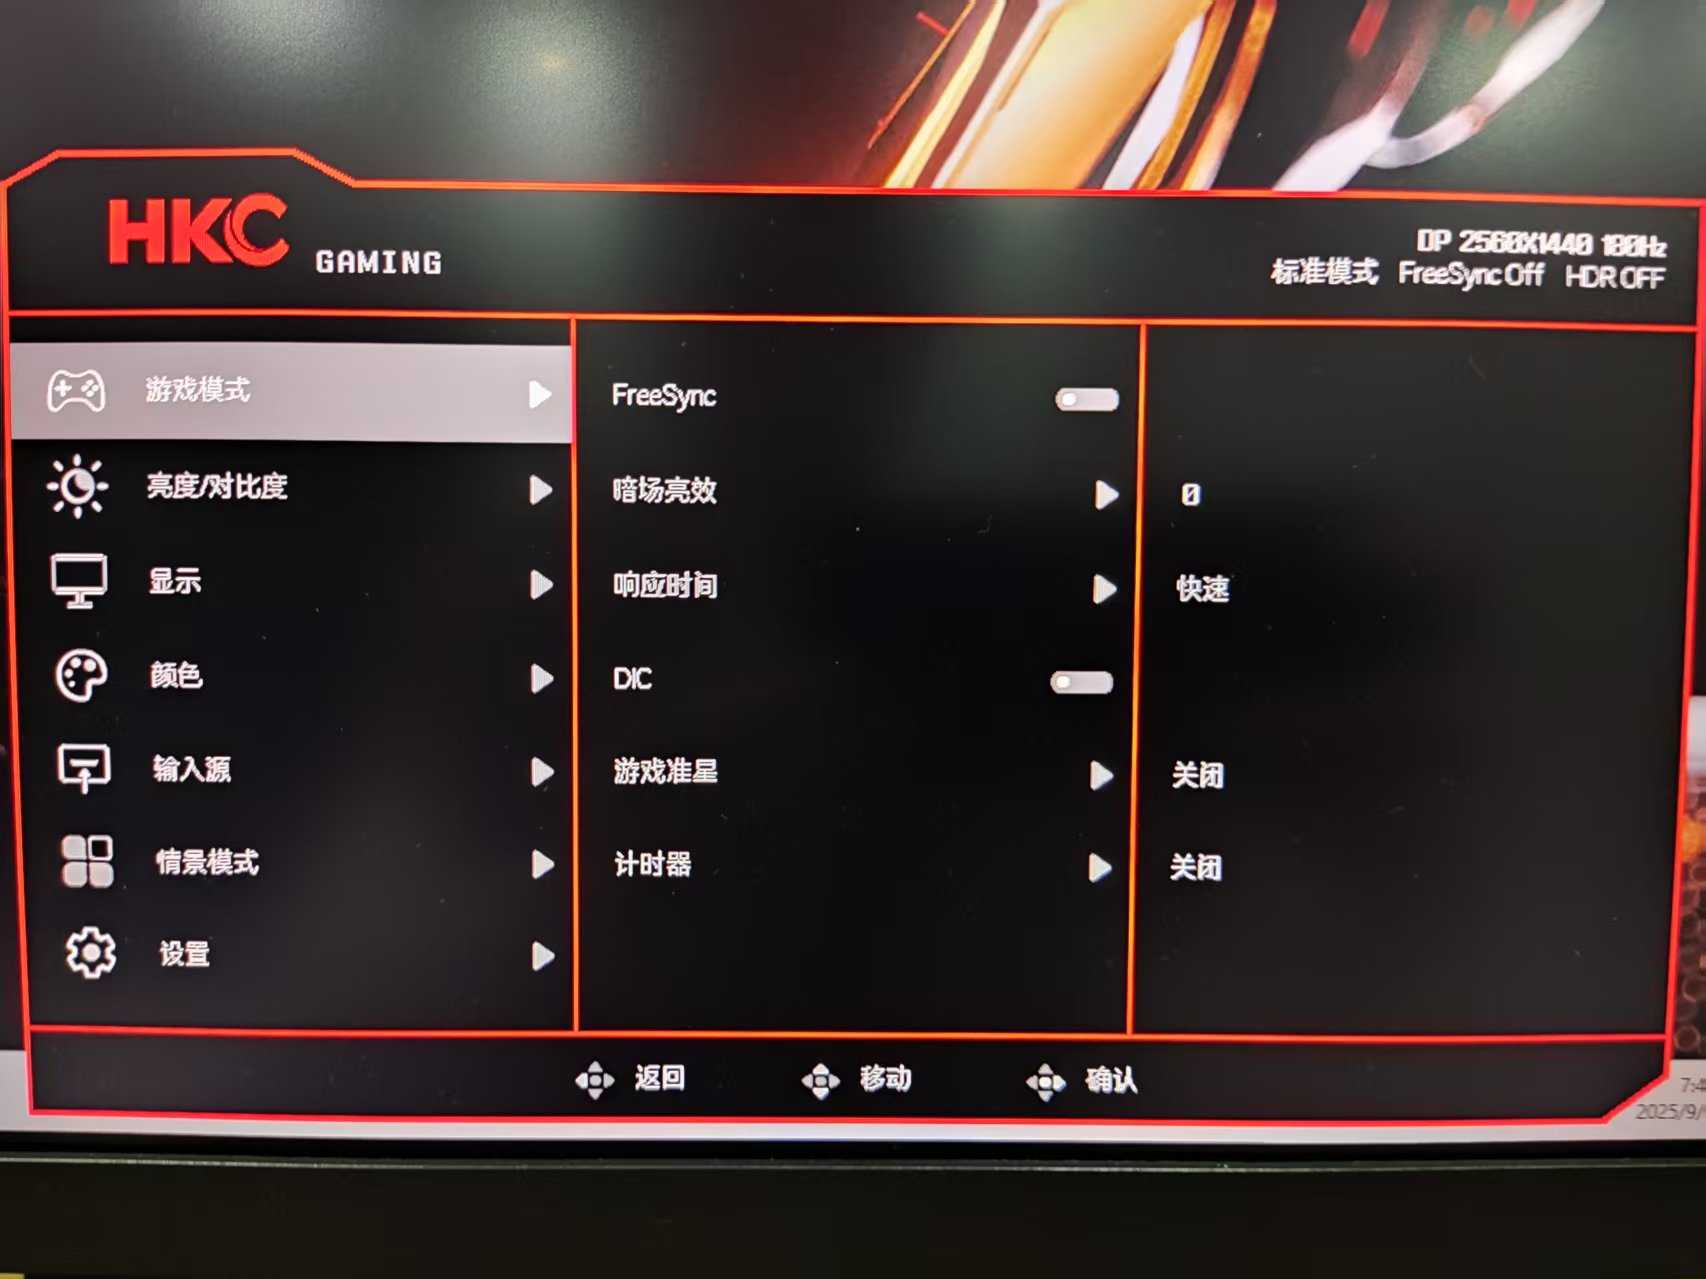
The DisplayPort cable included with the monitor purchase is somewhat unreliable, occasionally losing the DP signal. If you require a stable connection, it's best to purchase a separate DisplayPort cable.
Below are photos of the monitor.
Summarize
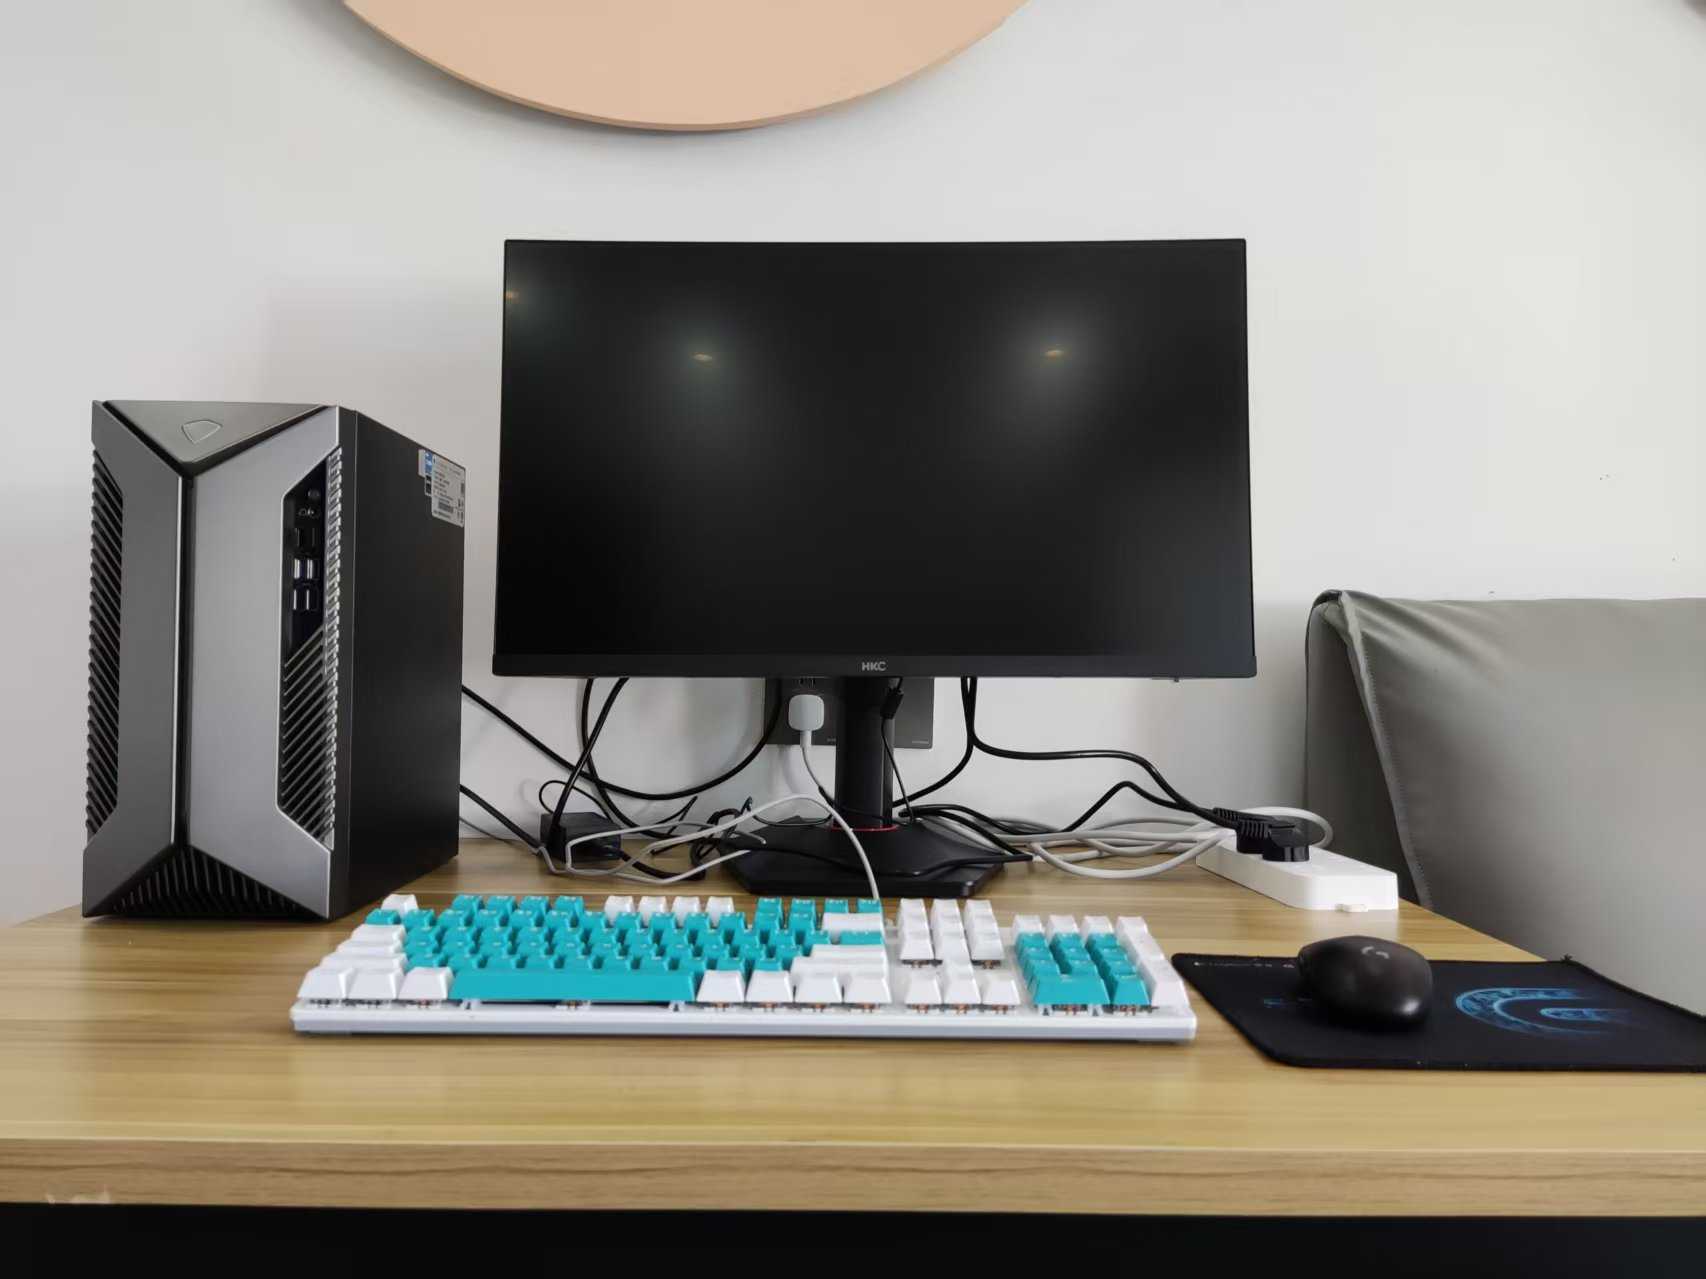
This is my first time buying a desktop computer. After a quick inspection, I didn't find any major issues and am quite satisfied overall. There was a minor interlude along the way—my old computer desk wasn't deep enough, so after placing the monitor on it, I'd get dizzy from staring at the screen for long periods. So I ended up buying my current desk, which measures 100cm x 80cm. Gaming and watching movies on it is absolutely amazing.
Here's a full shot of my setup.